Compression Spring Calculator Instructions
Spring Creator is an advanced spring calculator tool. This spring calculator will calculate the force and elasticity when it comes to loads, rate and distance traveled. The following instructions will demonstrate how to use the Spring Creator tool as well as how its many features, like the availability of stock springs, will benefit your testing and prototyping phase.

Step 1.) Choose Your End Type
-Closed and Square Ends:
Most economical and commonly used type of coil compression spring ends. Unless your coil compression spring needs to meet certain requirements like having a shorter solid height, closed and squared ends are the best option. In most cases closed and squared ends will stand vertically straight.

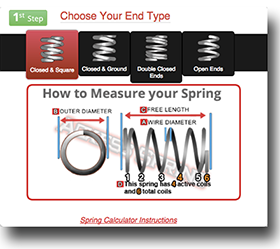
-Closed and Ground Ends:
Additional manufacturing labor is required so this type of ends is not so economical but it is also a common type of coil compression spring end. It gives your coil spring more stability by helping it stand straight on a flat surface. This type of ends will be helpful in case your spring is too long in proportion with its outer diameter.

-Double Closed Ends:
Double closed ends are basically closed ends with another closed coil added to them. These are also used to provide stability with springs that have large outer diameters coupled with smaller wire diameters so the spring ends don’t overlap on top of each other when compressed. Double closed ends are more economical than closed and ground ends.

-Open Ends:
This type of ends is required when your need you spring to travel or compress down to a shorter solid height, making it beneficial to take the closed coils out. With this type of compression spring ends all coils are active and the spring will have to go over a shaft or inside a hole to be held in place.

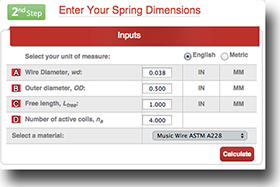
Step 2.) Enter Your Spring Dimensions
This is where you actually input your compression spring dimensions. The dimensions required are wire diameter, outer diameter, free length, active coils, and a material type. Once you have filled these in, you may click on “Calculate” and receive the results for your coil spring design.
To calculate the number of active coils on your spring, you must subtract the number of closed coils from the number of total coils. For example, you have a spring with 8 total coils. If it has closed ends or closed and ground ends, you will subtract two coils from the 8 total coils and get a result of 6 active coils. On the other hand, if this spring has double closed ends, you will subtract 4 closed coils from the 8 total coils and get a result of 4 active coils.
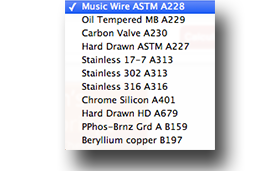
Our coil compression spring calculator also provides you with various types of material or wire types. Material types have different tensile strengths and some are specifically used for certain requirements such as environments with high temperatures or with a certain level of moisture or corrosion. If your spring isn’t being placed in a harsh environment and you don’t need any special requirements, music wire is the best and most economical option.
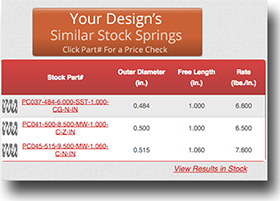
Similar Stock Springs and Closest Stock Spring
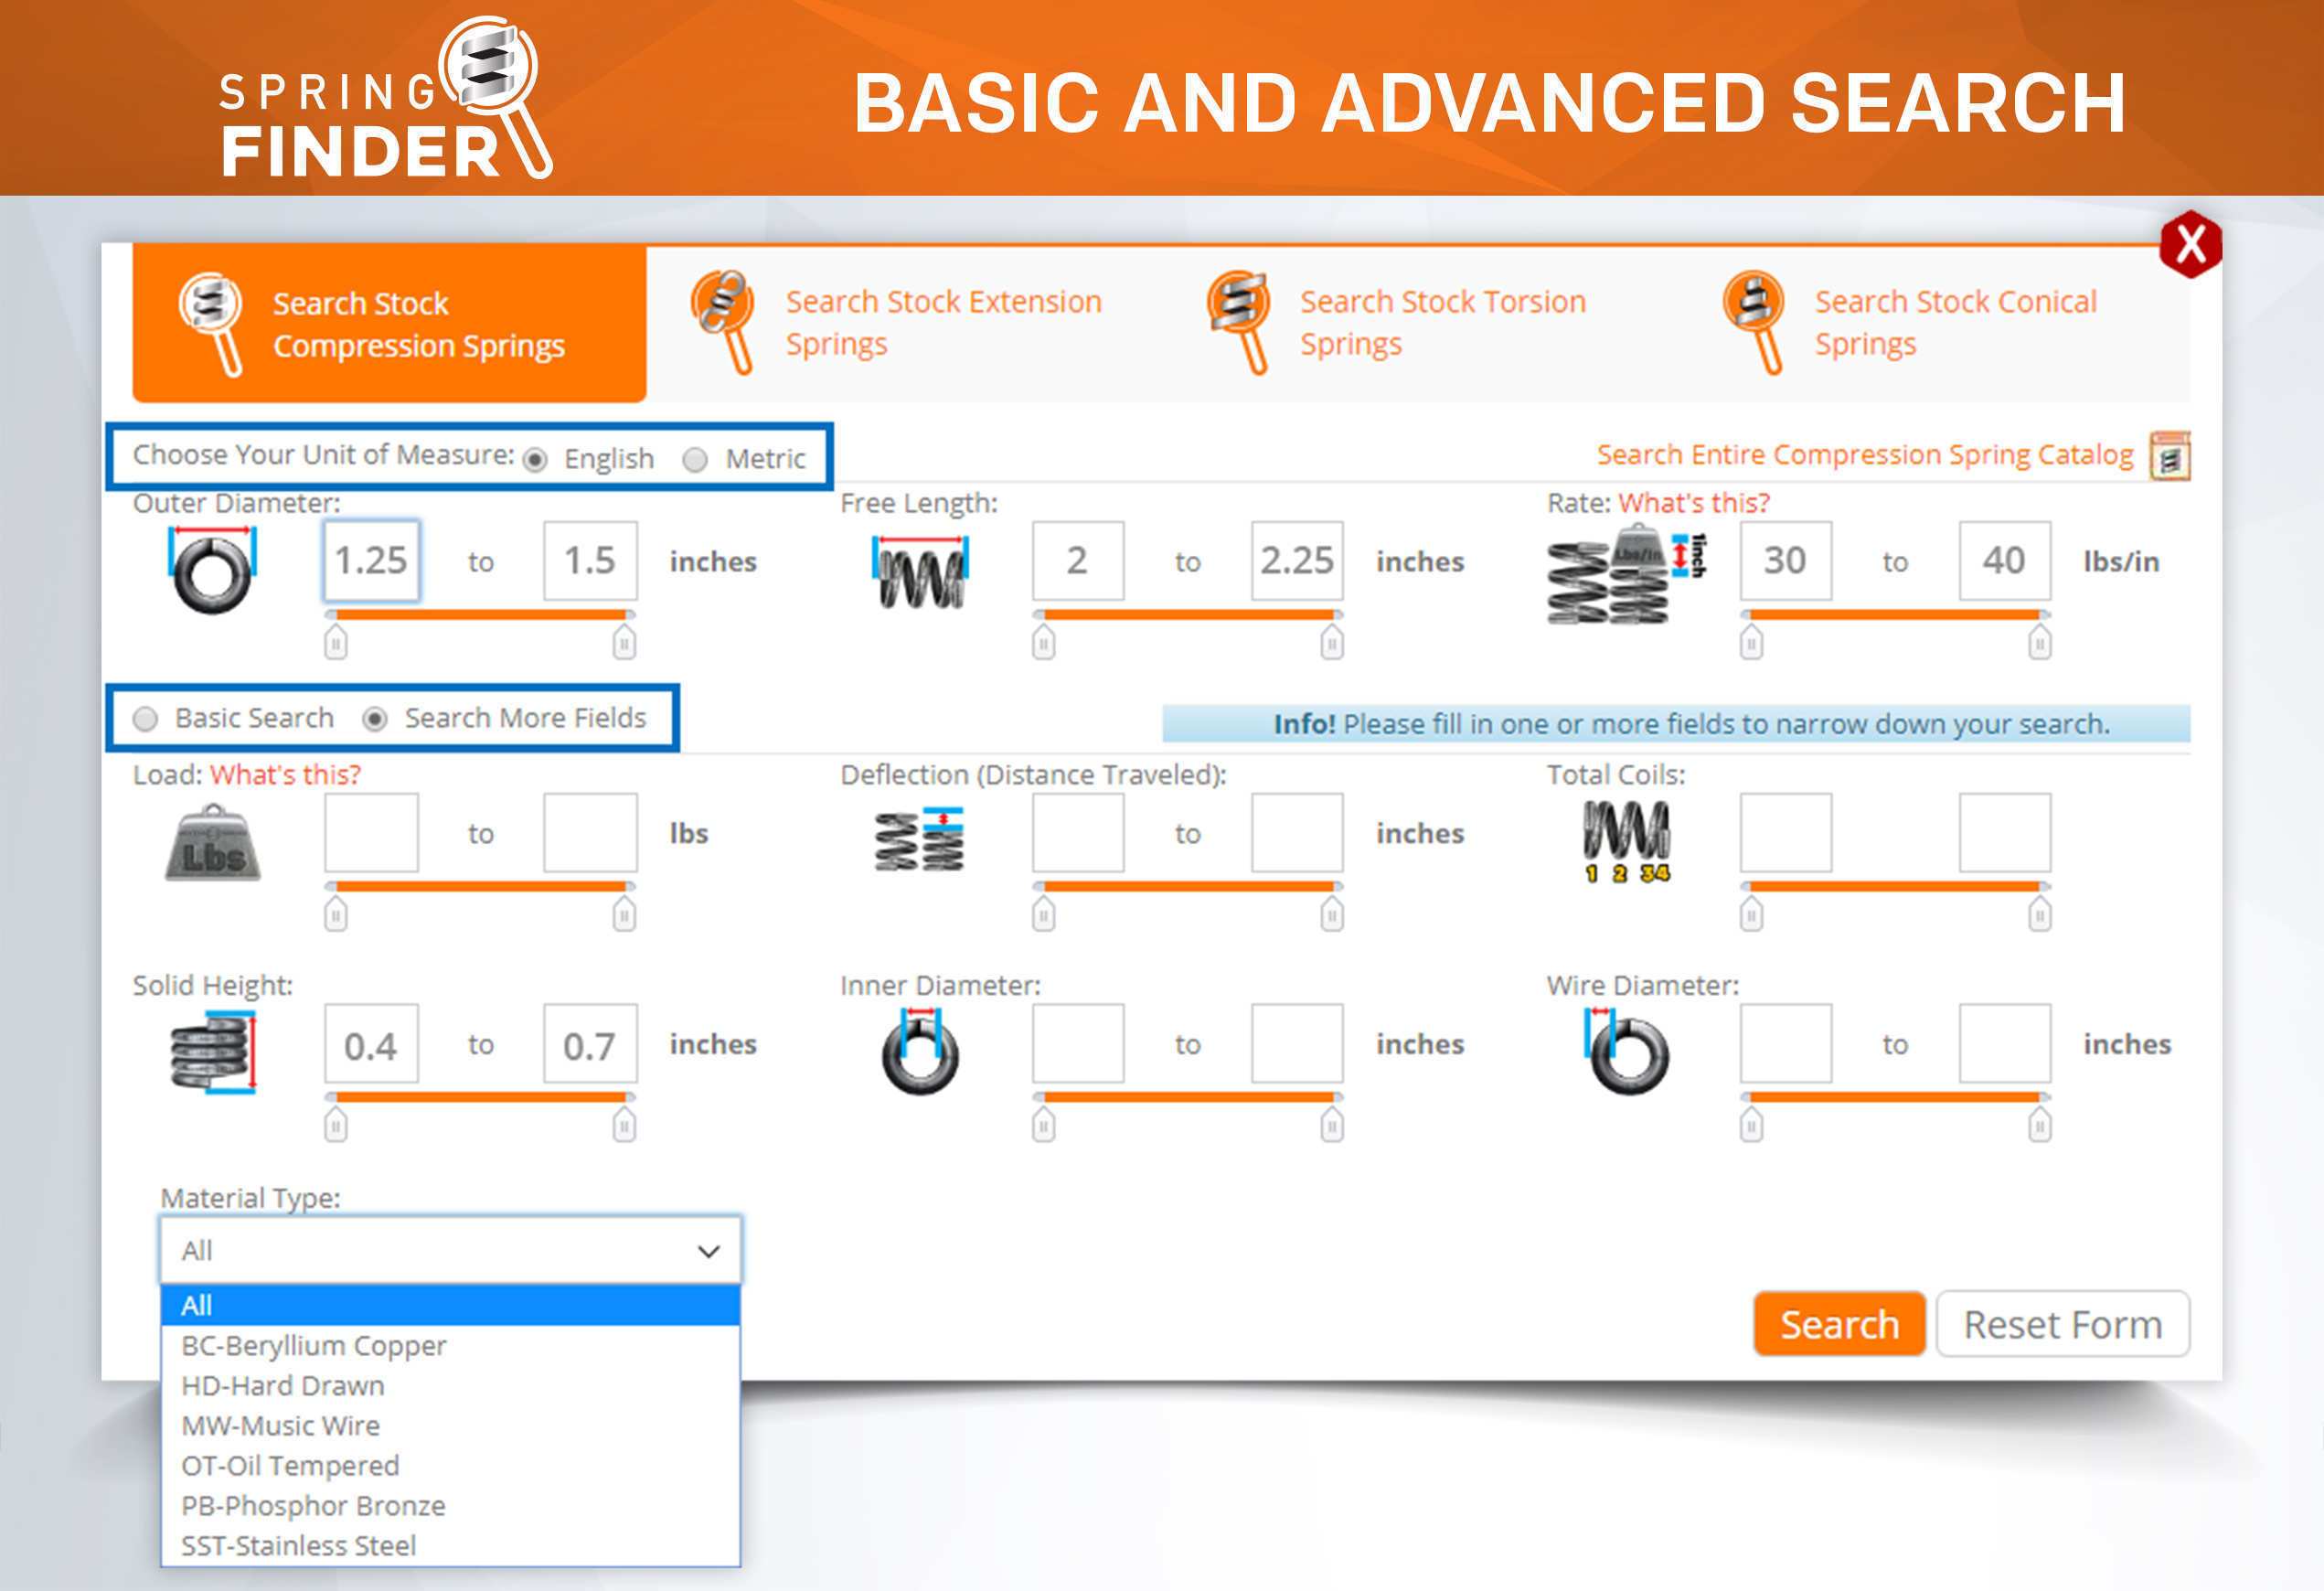
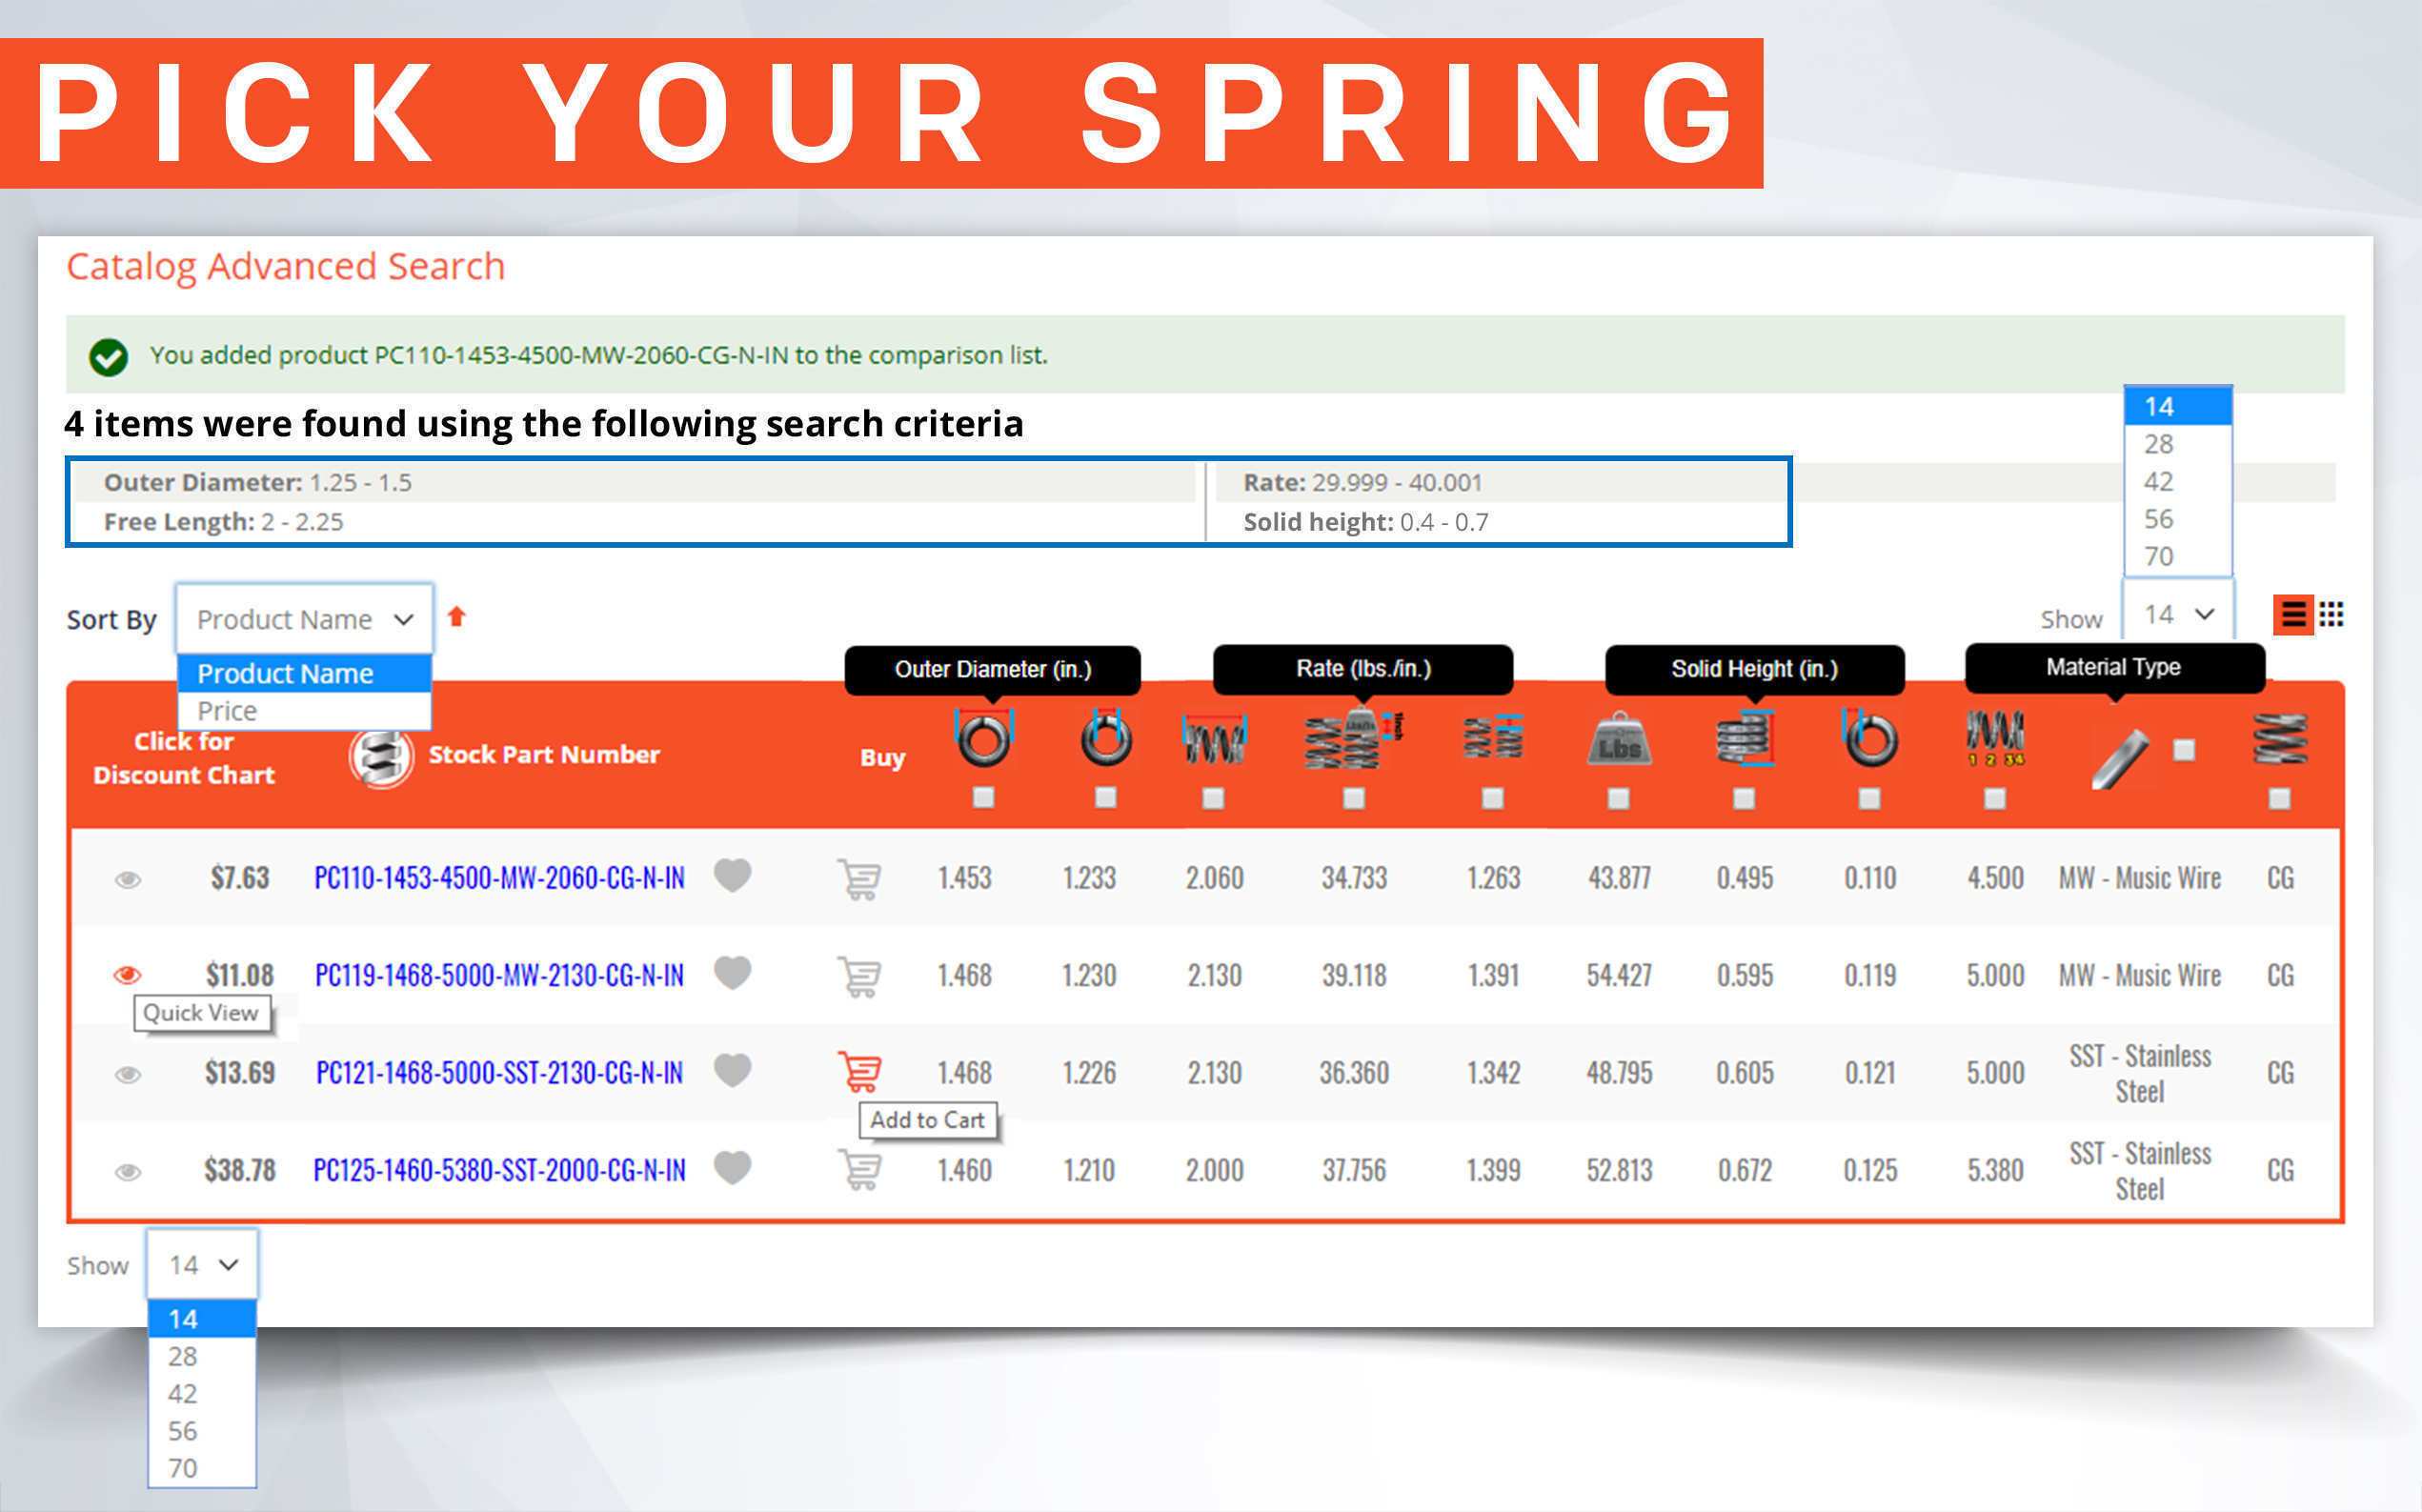
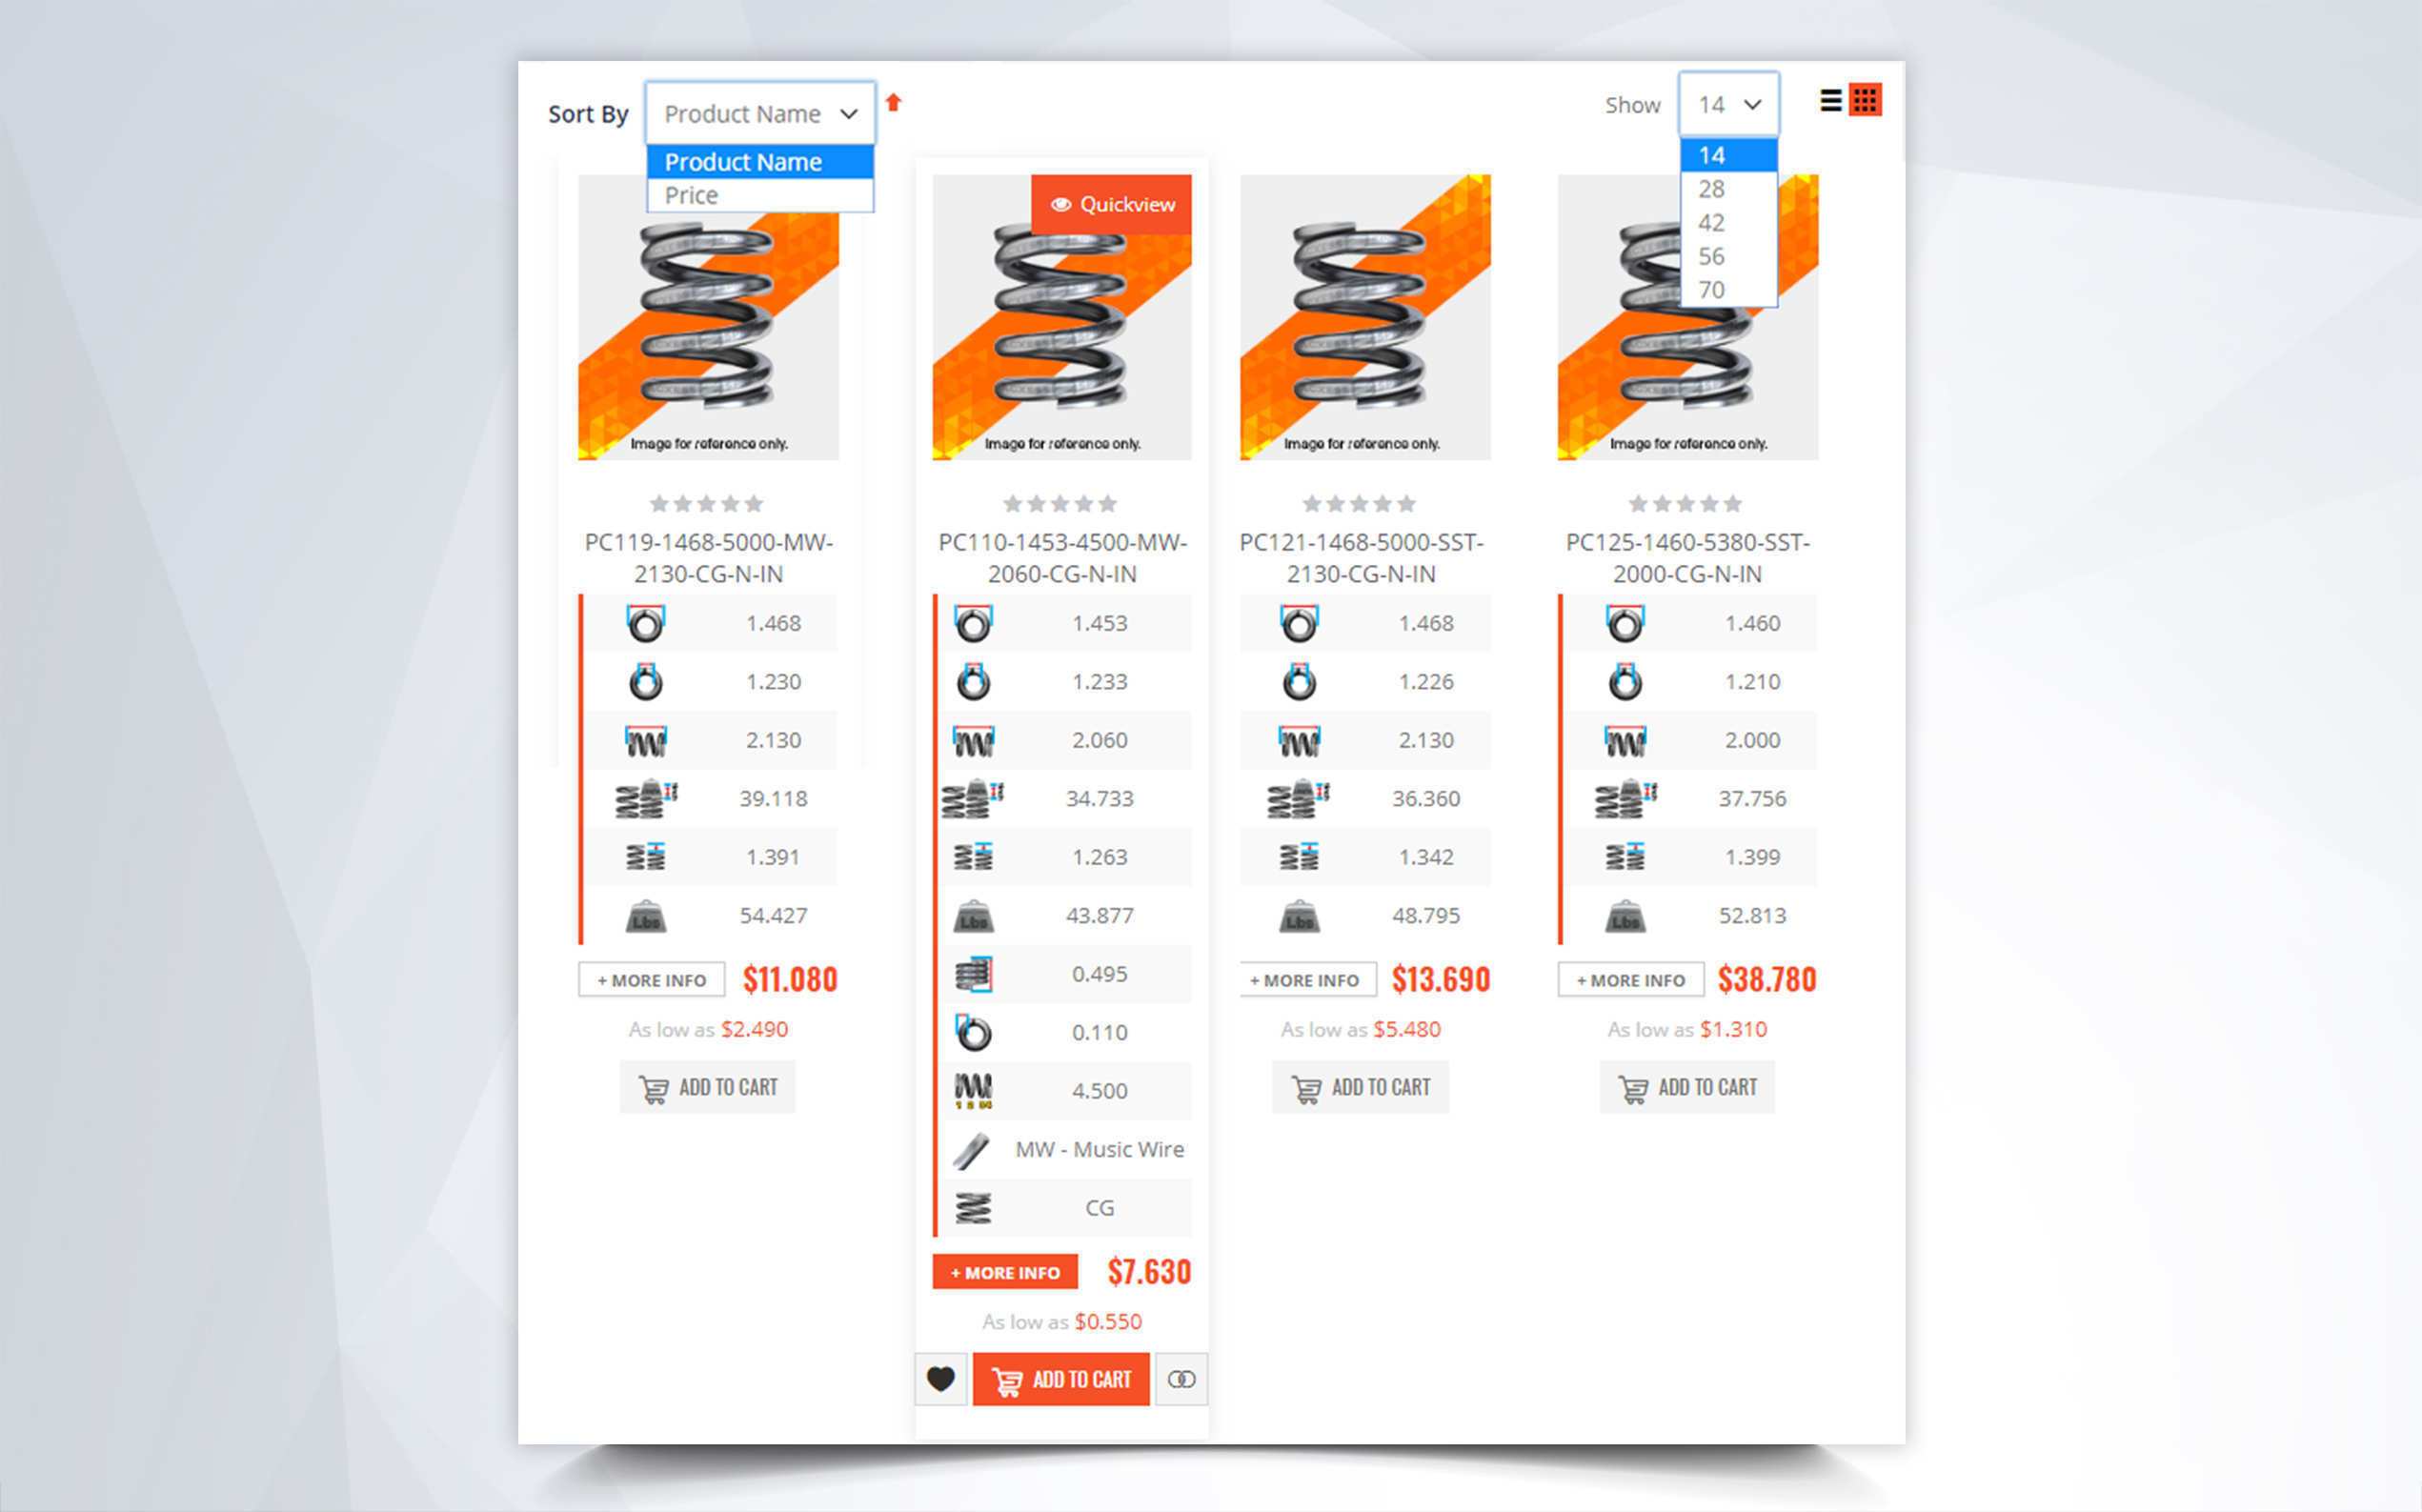
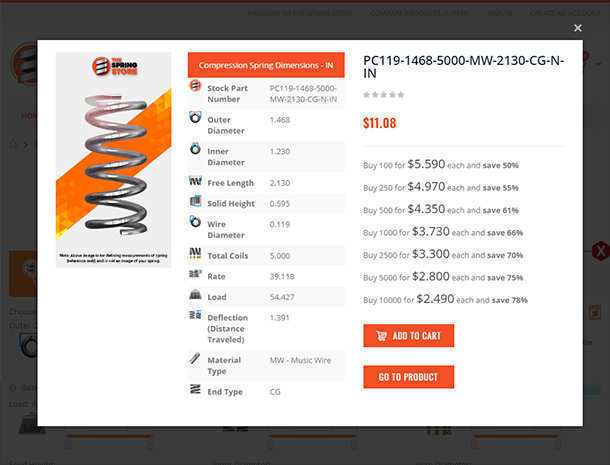
As you design your compression spring, Spring Creator will search our extensive coil spring catalogue to determine if your spring is available for immediate purchase. We can also provide you with the closest spring in stock to aid in prototyping stages, saving you time and money.
Step 3.) Review Your Answers
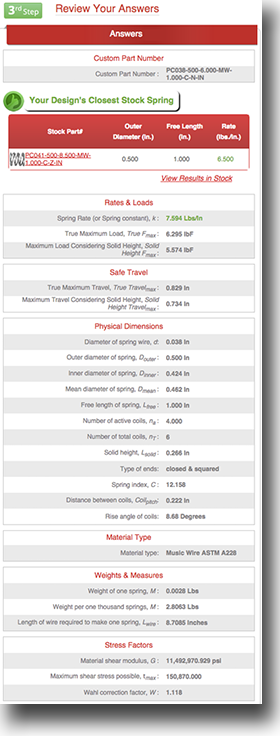
Here is where you see all your coil compression spring design results. From the smallest detail, like inner diameter or the distance between the coils (pitch), to the most important details like spring rate, maximum load considering solid height, or maximum travel considering solid height. You will find it all using Spring Creator.
Rates and Loads:
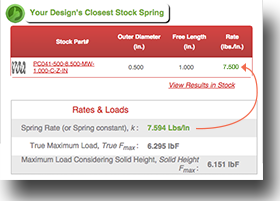
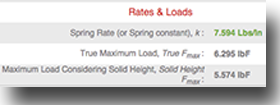
This is where you determine the strength of your spring. The coil spring rate will be highlighted in green since it is the “master” of your spring calculations. Rate determines how much load you will need in order to compress or travel down to your desired loaded height and vice versa. On the section above Rates and Loads, you will notice that you are provided with your design’s closest spring in stock and the spring rate is also highlighted in green. This is why it is the closest spring in stock, because it is the spring with the most common spring dimensions including spring rate. You will notice that you’re provided with two values, true maximum load and maximum load considering solid height. The difference between the two is that maximum load considering solid height is the maximum load of your current design and true maximum load is a possible load you can reach if you increase your coil compression spring’s free length.
Safe Travel:
This section provides you with information regarding how much you will be able to compress or deflect your coil compression spring. You are also provided with two different values here; true maximum travel and maximum travel considering solid height. Like load, maximum travel considering solid height is the travel you will get out of your current design while true maximum travel is the possible amount of travel your spring may achieve if you increase the coil spring’s free length.
Physical Dimensions:
You’ve already entered some of your spring’s physical dimensions in step 2 but here you are provided with some more thorough information regarding your spring’s physical dimensions. The dimensions provided are inner diameter, mean diameter, total coils, solid height, spring index, distance between coils (pitch), and the rise angle of coils. Mean diameter is the diameter in between your spring’s inner and outer diameters (from center of wire to center of wire) and it is used along with the wire diameter to calculate spring index. Spring index is the proportional ratio between your spring’s outer diameter and its wire diameter. This helps to determine the manufacturing difficulty of your spring. Total coils are the overall coils of your spring, active and non-active. Total coils is what helps to calculate the solid height of your spring which is the height of a coil spring when it is fully compressed and all the coils are touching. The pitch is the distance between your spring’s active coils uncompressed. The rise angle of coils is the diagonal angle your spring’s coiled wires form in order to provide that pitch.
Material Type:
This section simply provides the material type you chose your spring design to be made of.
Weights and Measures:
Here you are provided with the weight of the spring as well as how much wire your spring requires to be made. This section will help in the manufacturing phase of your coil compression spring as well as the shipping phase. You are provided with the weight of one spring, weight of one thousand springs, and length of wire required to make one spring.

Step 4.) Warnings and Helpful Tips
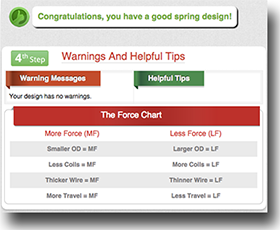
This section helps to warn give you specific warnings regarding your spring and tips on how to make adjustments so that you have a reliable spring design. You are also provided with our force chart in case you need your spring to be stronger or weaker. For more force, for example, you would have to make the outer diameter smaller, take some coils out, thicken the wire diameter, or add more travel by increasing the coil spring’s free length. To make your spring weaker, you would have to do the opposite; make the outer diameter larger, add some coils, thin out the wire diameter, or make less travel for your load by making the free length shorter. The warnings and tips (solutions) you might get are the following:
Warning: Your index is too small (below 4) which makes it difficult to manufacture.
Tip: In order to increase your index you will need to increase your outer diameter or decrease your wire diameter.
Warning: Your index is too large (above 15).
Tip: In order to decrease your index you will need to decrease your outer diameter or increase your wire diameter.
Warning: Your free length is less than or equal to your solid height.
Tip: You have entered a free length that is not possible based on your other inputs. To fix this, here are some options: increase the free length, decrease the number of coils, or decrease the wire size.
Warning: Your inputs have generated invalid or negative answers
Tip: Please adjust your inputs accordingly.
Warning: The force in L2 is less than the force in L1.
Tip: Your L2 must be greater than your L1. The formula for load is: rate * distance traveled = load. Thus if your distance for L2 is greater than L1, your load at L2 must be greater.
Warning: Your loaded height exceeds the maximum safe travel
Tip: If you need to travel a certain distance that takes you beyond the max safe travel, here are some options: increase huber of coils, increase outer diameter, or increase wire diameter.
Warning: Your load exceeds the max safe load.
Tip: If you need to reach a load that takes you beyond the max load, you ned to change your input values. Here are some options: increase the number of coils, increase outer diameter, or decrease wire diameter.
Warning: Loaded height / solid height conflict.
Tip: Your loaded height cannot exceed your solid height. To solve this problem, here are some options: readjust your loaded height, decrease your number of active coils, or decrease your wire diameter.
Warning: Your spring may buckle.
Tip: If your spring is not placed in a hole or over a shaft and has a free length divided by mean diameter greater than 4, you run the risk of the spring buckling while being compressed. To fix this problem here are some options: place the spring over a shaft or in a hole, increase the wire diameter, or shorten the free length.
Step 5.) Enter Your Working Loads
Choose a load that is within the limits of the minimum and maximum loads below. Once you choose a load or loaded height, the unknown value will be calculated automatically when you hit the tab key or click on calculate.
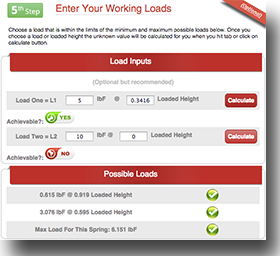
Note on load inputs: You must enter a load value that is within the “Possible Loads” list that is below the load inputs. If you enter a load value that’s NOT possible ( or beyond the Maximum Load Considering Solid Height) the calculator will display a “Red Thumbs Down” telling you that you’ve gone further than the “Maximum Load Considering Solid Height” listed on step 3. If you enter a possible load, the calculator will display a “Green Thumbs Up” Icon telling you the load value is possible. Also if you enter a loaded height within the “Maximum Travel Considering Solid Height” listed on step 3 and hit tab or calculate the calculator will display either a “Green Thumbs Up” if the loaded height is possible or a “Red Thumbs Down” if the loaded height is NOT possible. Please refer to your “Maximum Load Considering Solid Height” and “Maximum Travel Considering Solid Height” listed on step 3 for these values represent what your spring can achieve in load and Deflection (travel). Going beyond these values is not recommended because your coil spring will take a SET and NOT return to it’s original free length. You will also lose load on your spring or worse, you will cause breakage. If you need more travel add more coils, or make your outer diameter larger and increase your wire diameter.
Step 6.) Blueprints
Generate Blueprint:
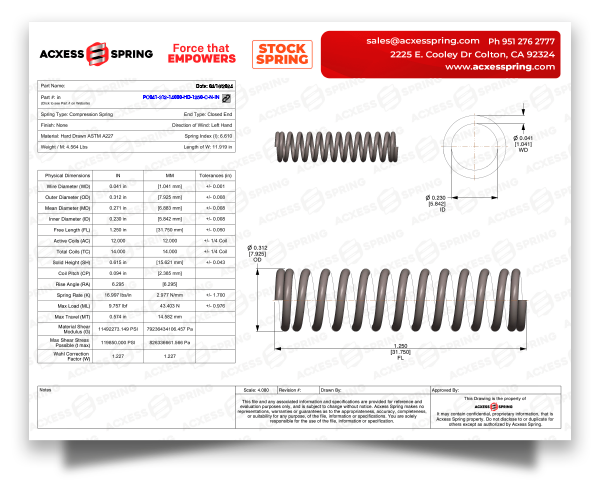
Click this and you will get a real time blueprint of your exact spring design which is editable. You will have a complete spring blueprint ready for manufacture. The editable fields you can add to this blueprint are: Part Name, Part Number, Drawing #, Drawn By, Revision#, Tolerances, Approved By, Finish (plating) and Manufacturing Notes. Once you’ve edited your blueprint click “Update Blueprint” and all the fields that you edited will be updated and reflected on your blueprint.
Get a Quick Quote of Your Spring Design:
This feature lets you quickly send us a quotation. The spring blueprint will automatically be attached to the quote.

Email Design & Blueprints:
Once you are comfortable with your blueprint click on the “Email Design & Blueprints” and email the PDF blueprint directly to yourself, colleagues, and potential clients without leaving the Spring Creator App, increasing productivity and efficiency.

Similar Springs In Stock:
This link shows you similar springs and the closest spring in stock to your design that is ready for purchase. As you design your spring, Spring Creator will search our extensive spring catalogue to determine if your spring is available for immediate purchase. This will aid you in the prototyping and testing stages, saving you time and money.

We really appreciate you using “Spring Creator” we work to meet your spring design needs and to supply you with a complete and comprehensive spring calculator. If you need further assistance on designing your spring please give us a call @ 951-276-2777 we are here to help!
We welcome your comments or suggestions to make “Spring Creator” even better. Please email us at: support@thespringstore.com


